This post will outline the main differences and benefits of RawTherapee vs Lightroom photo processing systems. There are tons of great features in both software which is why we though a clear comparison is needed. After reading this comparison, you should be able to tell which editor is best for your needs.
RawTherapee in a nutshell
RawTherapee is a well known photo processing system. It was first developed by a single developer from Budapest but was later taken on by a bigger team of image processing enthusiasts in 2010. The main reason it is so popular because it is completely free. Alongside the non-existent price tag, it is a very powerful and cross-platform raw photo editor. The software is designed for developing all kinds of raw image files from almost any kind of digital camera and device. These features make it optimal for newcomers and professionals photographers alike.
The main benefit of RawTherapee is the huge amount of features it contains. You can learn to do almost anything with the software, but it does take time and dedication to learn everything. Alongside powerful tools and features, the best part about RawTherapee is the huge community surrounding it. You will be able to find tons of tutorials and guides as well ask ask around in the official forums if you encounter any issues.
You can download RawTherapee for FREE at their official website at https://rawtherapee.com
Lightroom in a nutshell
Lightroom is the most popular photo processing tool in the world. This is mostly due to the fact that it’s made by Adobe. It has tons of features, but the biggest issue is that it’s not free. In fact, it’s quite price as you need to purchase Adobes monthly plan starting at $10 a month.
Lightroom also has great integration with Adobes cloud storage and collaboration tools making sharing and working in teams a lot easier. Probably one of the best parts about Lightroom is that it has tons of official guides and tutorials produced by Adobe so they are guaranteed to be high quality.
Lightroom is also downloadable on any device including your PC, tablet and mobile devices. Alongside great support and sharing capabilities, tons of other features make this app the top choice for most professional image editors and photographers.
You can find out more and start a 7-day free trial at the official Lightroom website.
RawTherapee vs Lightroom – How they compare?
RawTherapee has a powerful engine allowing for non-destructive and 32-bit high definition imagery. The software uses complex algorithms to allow for fast processing and editing. The free suite of tools provide advanced color and detail modifications for any raw files and even High Dynamic Range images (HDR).
RawTherapee is great for processing raw image files for a few reasons. It uses two separate demosaicing algorithms simultaneously on the image you are working on. This means you can see all your edits in real time and the render times are blazing fast. The software also includes the ability to work with multi-frame files and dead pixel correction. Alongside countless other features, you can’t go wrong with RawTherapee.
Adobe Lightroom has a lot of similar features when it comes to the RawTherapee vs Lightroom comparison. Some of Lightrooms most popular tools include the gradient filter, adjustment brushes and great post-crop tools. Lightroom also has presets similar to RawTherapee alongside a huge collection to choose from from their official repository.
Although Lightroom is not only based on editing raw photo files unlike RawTherapee, it has great tools to handle that as well. In the end it is very much down to user preference, trial and error when it comes to choosing between these two applications. Keep reading to find more features of these apps and what makes them distinct.
RawTherapee presets
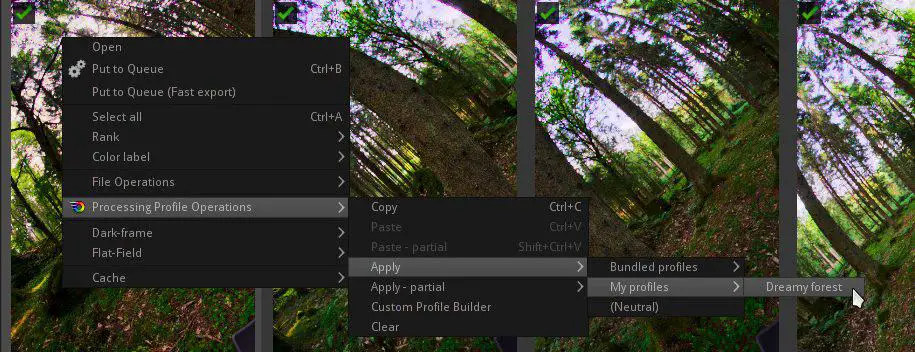
Another great feature of RawTherapee is that you can use processing presets made by other users. Due to the software being open-source and free to use, there’s a huge community around it. One of the best places to look for these presets is the official Pixls.us forums. All experts and beginners a like talk about all things related to RawTherapee presets, tips and troubleshooting.
You can find thousands of different custom presets online for free. You just need to search up the type of processing you’re looking for and you will surely find plenty of options. Creating and saving your own processing presets within RawTherapee is also very simple. You can also set your preset processing profiles as default for non-raw or raw photos. Alongside the preset profiles, you are also able to set your profile as dynamic if you so wish.
You can also find some quality RawTherapee presets from their official website. For example the Film Simulation tool allows you to match colors and properties within an image with a reference image. This way you can easily make matching modifications and edits to your photo. From that same page, you can find a huge collection of film color simulation HaldCLUTs to be used free of charge. Just make sure not to modify the image too much as effects like color reduction can be bad for the actual image quality.
RawTherapee manual
Users often look for user guides and manuals on RawTherapee as it can be quite intimidating to get started with. Thankfully the internet is filled with guides, tips and tricks on how to get better at using the software. The first place you should check is the official RawTherapee manual or wiki page found on their website. All the information can be printed out as a PDF and it has been translated in 7 different languages alongside English.
Another fantastic place to look for guides on how to use RawTherapee is YouTube. It’s filled with tons of great videos made by power-users. You can surely find any type of RawTherapee manuals and videos matching any skill level. Alongside videos, the best thing to do when learning a new software, is just messing around in it on your own. That way you’ll get used to the menus and navigation as well as learn tons of new features even by accident.
RawTherapee workflow guide
When it comes to workflow, thankfully RawTherapee has a very similar workflow to other similar apps like Lightroom. You will be able to figure out the ins and outs pretty fast by looking at some of the documentation and manuals mentioned above. You can see how simple the workflow is when comparing RawTherapee vs Lightroom, as it doesn’t have nearly as many unrelated features to think about.
The first step is starting up RawTherapee and opening your raw photo file from the File Browser tab. Once you’ve selected a photo from you PC, you can simply double click on the image within the editor to begin the editing process. It is good to note that RawTherapee never modifies the original raw copy of the file, so there’s no chance you might destroy your original images. This let’s you have fun editing without needless worries. The main workflow in RawTherapee goes as follows.
Editing the colors, exposure and detail
Now that you’ve started up the software and imported your raw photo, you’re ready to start doing some modifications. It’s good to note that when importing a photo, RawTherapee attempts to match your camera’s output settings automatically. So if you already like what you see once you open your photo, you might be ready to go straight to the saving stage. Otherwise read on.
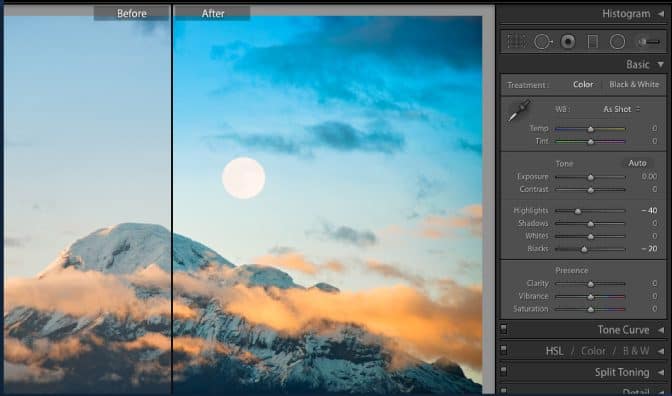
Now you’re ready to start making changes to your color schemes. First you need to navigate to the Color tab. You can find plenty of options within the color tab to modify. First thing you should do there is open up the White Balancing by pressing W on your keyboard. You will notice it is set to your camera’s settings by default. Now just adjust the temperatures and tints using the sliders to your hearts content.
Next up, navigate to the Exposure tab under the processing profiles. Similar to the colors, just use the sliders to modify the exposure to your liking. We recommend mainly modifying the saturation and compensation sliders. Once you get more comfortable with the tools, you can start changing up more of the complex options.
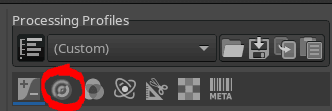
If your photo is looking too noisy after your tweaks, navigate to the Detail tab. Once you’re in the detail tab, make sure your image is zoomed in at a 100% scale. You can do this by pressing Z on your keyboard. Finally just press on the power icon to enable noise reduction and tweak it to your linking.
Editing the geometry and composition
The last things you need to take care of in the RawTherapee workflow is to fix up the composition and geometry of your raw photo. First you want to correct the horizontal and vertical aspects of your photo. These include things edges of buildings or lamps and other similar structures. You can do this simply by pressing S on your keyboard and dragging a line across the edge you wish to correct. Your image will then rotate as needed and you will be take to the Transform tab automatically.
Next you want to do any needed cropping to the photo. To do that, you can simply press C on your keyboard, then drag the crop tool over an area in the photo. You can also change the crop type according to your preferences from the crop settings.
Last but not least, you should downscale the image. This allows you to reduce the file-size of the image so it won’t take so much storage space and will be faster to upload. Note that you won’t notice the resizing inside the editor, only on the final saved file.
Saving your Photo

Finally you’re ready to save your photo. You can click on the button above or just press the Ctrl + S key combination. Generally the default settings for rendering the image are pretty good for generic saving and you might not need to mess with them too much. You can save the modifications and settings you used as a PP3 file so you will be able to re-open the file in RawTherapee and keep editing from where you left off.
RawTherapee vs DarkTable – How they compare?
DarkTable is another great alternative to raw photo editing and processing. It has a lot of unique features and tons of familiar ones as well. When it comes to comparing RawTherapee vs Lightroom, DarkTable comes ahead of Lightroom as it is completely free. We listed some of both apps best features below to see how RawTherapee compares to DarkTable.
RawTherapee
- Automatic JPEG matching
- Dual demosaicing and automatic curve matching
- Wavelets for precise editing
- Tons of automated settings depending on your camera options
- Ability to use .dcp profiles
- Reliable noise reduction tools
- Ability to view your previous editing history
DarkTable
- A lot of masking tools
- Better collection and metadata support
- Great equalizer options
- Advanced color zones
- Multiple simultaneous module instances
- Generally faster processing
All in all, both are great tools, but RawTherapee has a great community surrounding it and the great features make it a very solid option as your primary photo processor. Tons of people like to use both tools, so there is no clear answer between using RawTherapee vs DarkTable. You can find more information about DarkTable on their official website.