
Window management on windows operating systems has always been quite complicated. Windows 10, however, is a bit more lenient on that front. Nowadays, ultra-wide monitors are becoming the norm and people need to know how to handle them.
What use is a fancy new 31-inch curved monitor if you only use one massive browser window at a time? We’ve collected some tips on effective window management on Windows. On top of that there is a nifty window manager to get even more use out of your monitor space.
Window Management Built-in to Windows
Most people assume a separate software is required for simple window management. Such is not the case with Windows 10. Microsoft has programmed various key combinations that can be used off the bat.
Such key combinations can be used for things like split screen windows or vertically- / horizontally split windows. However, for more complex splits like a 3 or 4-way split, you still need some additional software.
Windows Aero snapping
The first and easiest method of arranging windows to specific corners of the screen is by dragging. Yes, all you need to do is drag a window to any of the four corners of the screen.
The window will resize itself, occupying only a quarter of the screen. Dragging the window to the bottom or top edge of the screen will maximize it once again.
Cycling through active windows
One of the most popular key combinations among gamers is the famous Alt + Tab. While holding the Alt key, you can cycle between all windows by pressing the Tab key repeatedly. Once the window view is opened, any of the windows can be clicked to open them.
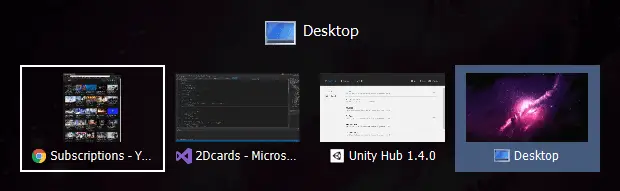
Another very useful window management shortcut along the same lines is Alt + Esc. It allows you to minimize the current window, which is very effective especially when in a game or a full screen application. It’s faster and more efficient than trying to minimize a window using Alt + Tab.
The new Windows 10 Task View
Although quite similar to the previously mentioned Alt + Tab method, a new addition to Windows 10 window management is a feature called Task View.
You can open the Task View by pressing the Windows key + Tab. The task view shows all your active windows in a full-screen view, without having to hold any keys down to navigate it. The task view also shows previously opened windows and applications spanning across multiple days.
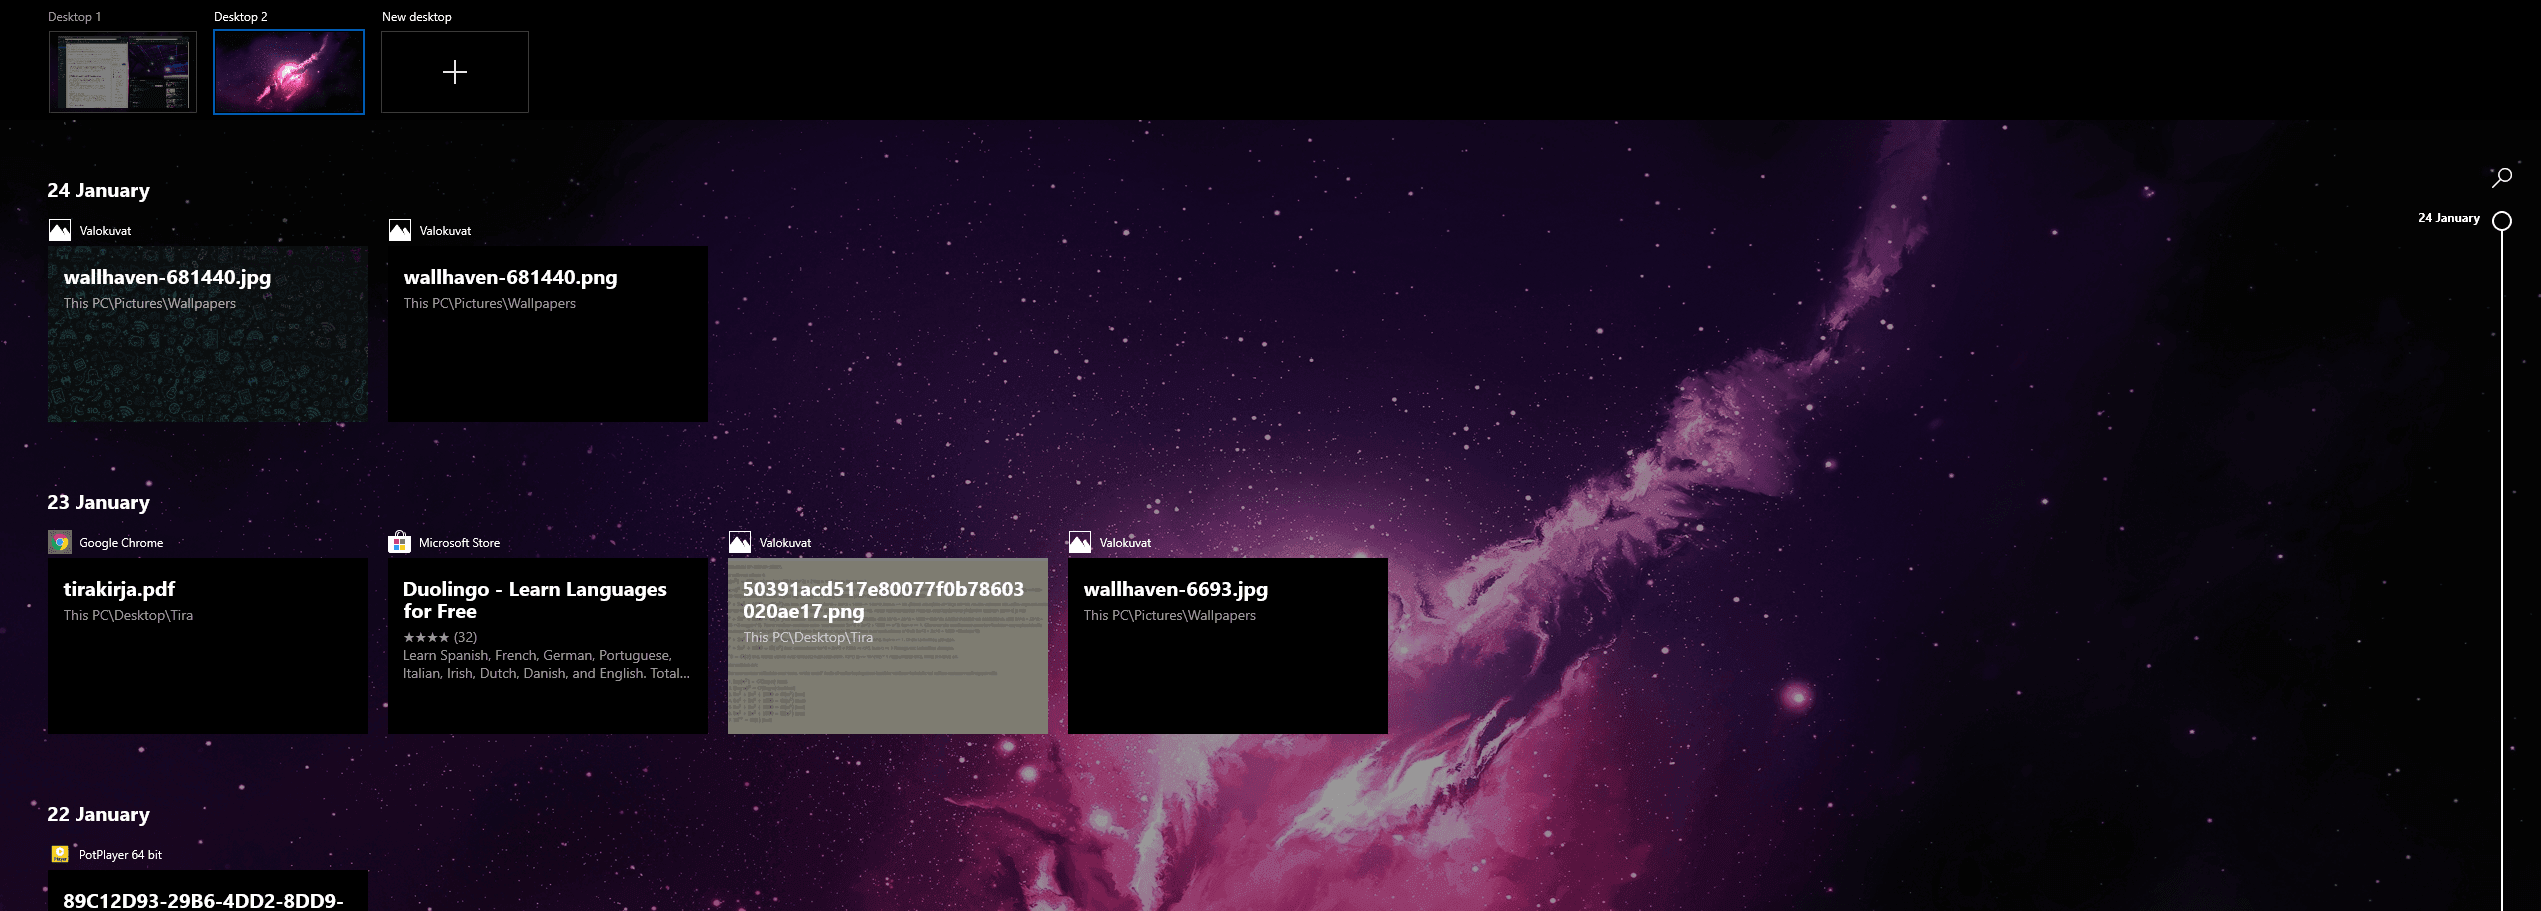
Another fantastic, little-known feature of the Task View is the Virtual Desktop. This basically allows for infinite “empty” desktops hidden away to be activated at will. This allows the user to hide any windows or just keep related programs open on their own desktop instance.
In order create a new virtual desktop, activate the Task View with Windows + Tab, then click on the “+ New Desktop”- button in one of the corners.
You can just press ‘Windows + Ctrl + D’ to create a new virtual desktop faster. You can use ‘Windows + Ctrl + Left or Right arrow’ to switch between virtual desktops you’ve created. In order to quickly close one of the virtual desktops, just press ‘Windows + Ctrl + F4’ to close the active desktop.
Useful shortcut keys for managing windows
Press ‘Windows + D’ to show or hide all windows. This allows for quick access to the Desktop.
Press ‘Windows + M’ to minimize all windows. Also works to show Desktop, but wont toggle windows.
A better alternative for the above combo is ‘Windows + Home’, it minimizes all but the active window.
You can also click the windows task bar with the Right Mouse Button and choose to either cascade windows, stack windows, show them side by side or to show desktop. It’s not very convenient but does the job if you don’t want to bother with any software like the one described below.
More efficient Window Management
If you prefer more control over your windows than the basic hotkeys Windows 10 provides, then keep reading. With an outburst of ultra-wide monitors, it is very common to want windows side by side or in every corner.
To map your own shortcut keys for these features and for a lot of other bonuses for window management in windows 10, you’re going to need a Windows 10 window manager called DisplayFusion.
There are some other alternative programs to do this, but most of them don’t offer nearly as much customization.
What is DisplayFusion?
DisplayFusion is a fantastic Windows 10 window manager that allows for custom hotkeys for moving windows between and within screens. It also has many other great features like rotating wallpapers, task bar customization and a plethora of useful monitor configurations.
The best part about all of this, is that it’s FREE! There’s a premium version to buy for around $20, but it only provides additional features like image quality tuning and other things we’re not looking for at this time.
Obviously you should purchase a license if you enjoy the software.
You can download Display fusion on their website by clicking here.
Splitting Screen to 3 or 4 sections with Shortcuts
Now that you have installed DisplayFusion, there are multiple ways to split your screen into portions.
One way is to create shortcuts to move the active window into one of your pre-defined positions.
Another way is to split your monitor into multiple custom sized virtual desktops. This differs from the Windows 10 virtual desktops, as these are shown on your screen constantly.
You can even program your own shortcuts and window positions into the software, but for simplicity we’re going to use the ones already included.
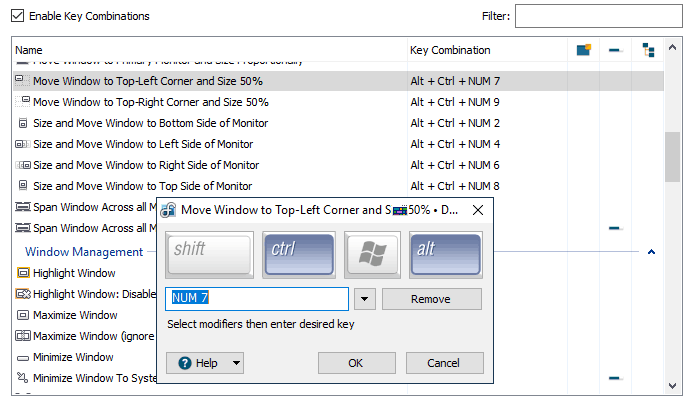
First, right-click the display fusion icon in your task bar and select Settings.
From the settings window, go to Functions. Now you can just look for the functions you would like to use and map them to your liking by double clicking them.
The picture below showcases some of the shortcuts I personally use to handle windows between an ultra-wide and a normal 24 inch monitor.
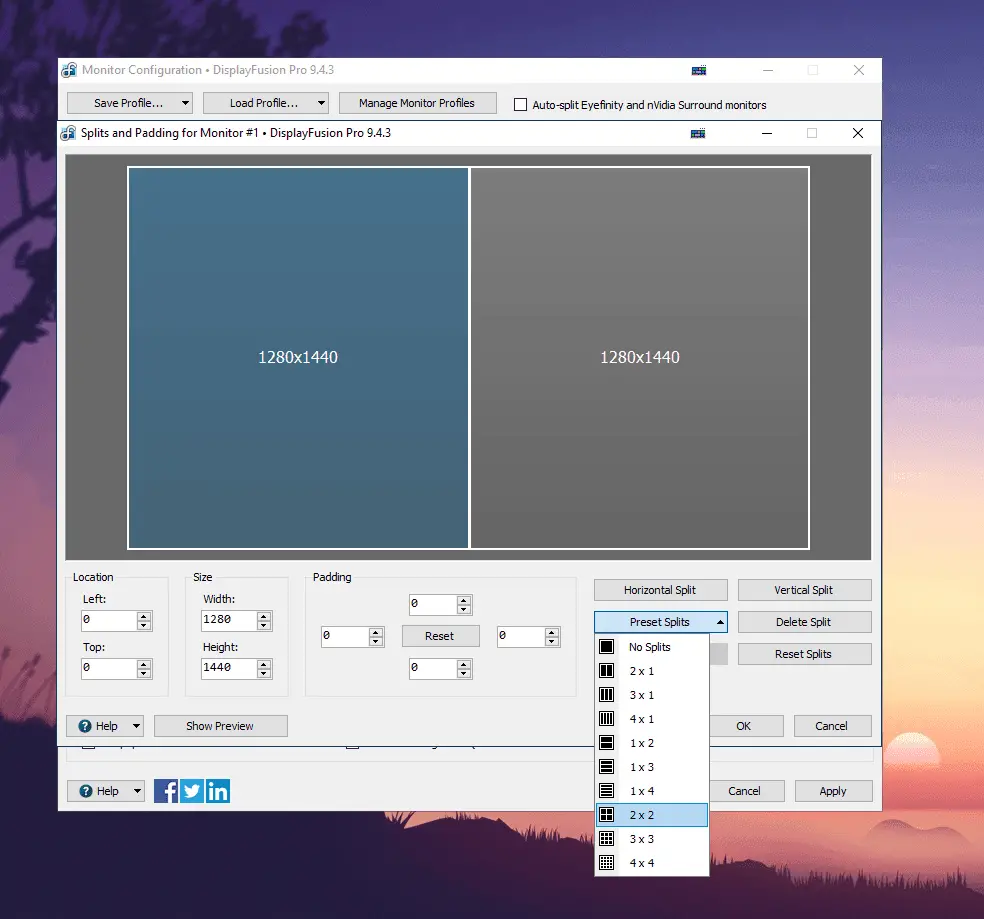
To split your screen into multiple sections to expand windows to those positions easier, it’s actually very simple. All you need to do is right-click the display fusion icon in your task bar and select Monitor Configuration.
From there, select your monitor you want to split and click on the ‘Splits and Padding’ button under the Color Depth box on the right.
From there you can select a preset layout or choose your own resolutions. If you choose your own resolutions, remember to tick the ‘Auto-Fill All Splits’ box to not leave any gaps.
Now that you have your monitor mastered and hotkeys on cue, make sure to play around for optimal settings.
There are tons of things to do with this Windows 10 layout manager software, but there are some bugs as well.
If you don’t like some of the possible lag or problems, you might want to stick to the Windows 10 built-in window management.
If you’re looking for a new monitor, check out our buyers guide for new monitors. It should help you make a more fulfilled selection.