Windows 10 has made it very easy to share files and folders over the local area network even without a dedicated hosting machine.
All you need to do in order to share a folder on Windows 10 over LAN is select the user to grant access to and decide if you want it to be available for offline access as well.
We made a quick video version of this guide which covers all the basic functionality, if you prefer following a video guide.
Check currently active systems in the network
The first step should be to check all the currently available systems within your local network.
The reason for this is because you must enter network credentials in order to access any files on a specific system.
Active network devices can be checked by first opening up File Explorer and then clicking on the Network icon in the drive hierarchy on the left side of the window.
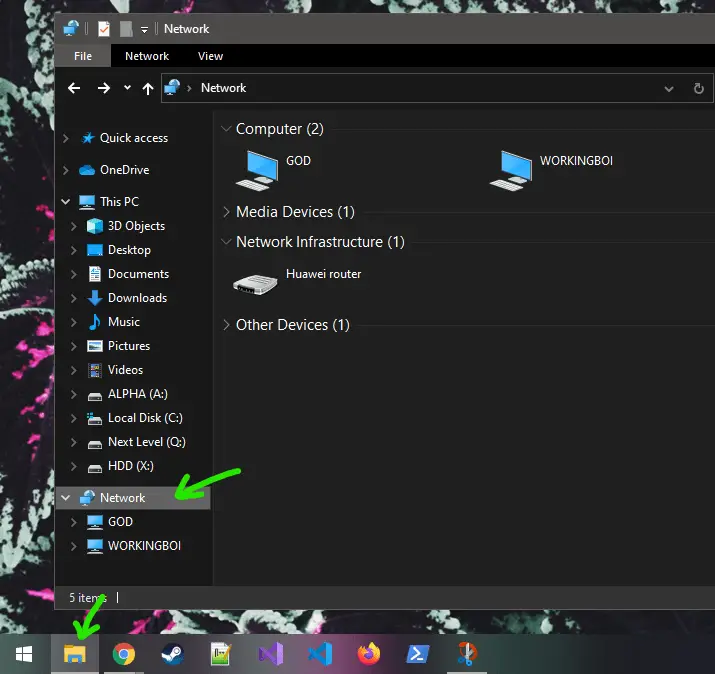
You should now see all the devices currently connected to your network and you should be able to connect to them by clicking on them.
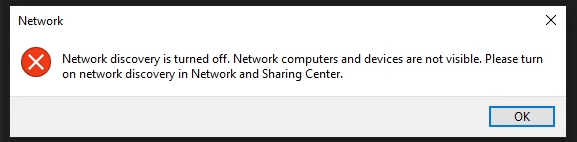
However, in some cases network discovery is disabled, which will produce a warning message and not show any devices in the list.
What to do if you can’t see any computers in the network?
If you can’t see any systems in the local network, there can be a few issues that cause this.
The most common issue is that network discovery is disabled, which should show you an error message.
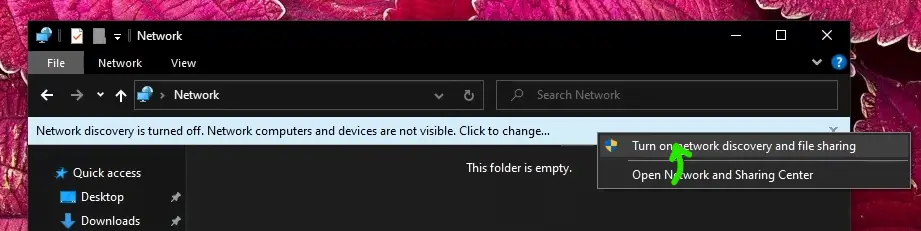
If you see this error, you should see a notification at the top of the file explorer asking to turn on network discovery.
This can be accomplished simply by clicking on the notification and selecting the first option.
After this, you should be able to see all the online devices in the folder.
If you still don’t see the device you’re looking for, make sure that you have enabled discovery and file sharing on that system as well.
You also need to ensure that all your devices are connected to the same network or router.
It doesn’t matter if one device is connected using an Ethernet cable and another through Wi-Fi, as long as the traffic goes through the same router.
Access a system in the Local Network
The next step is actually signing into the system you plan to share files with. You need to do this step only on the non-host device, meaning the system that needs to “ask” to access the files.
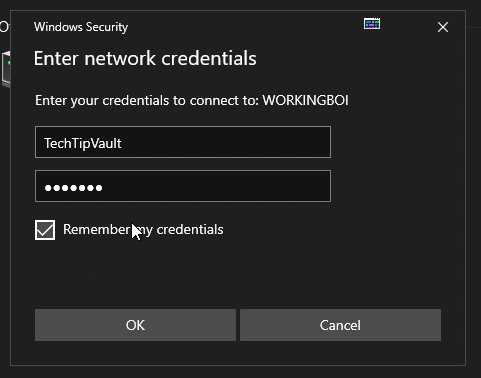
Accessing a device is as simple as clicking on it, after which Windows will prompt you for network credentials.
These credentials simply mean your Windows 10 login details. If you have a normal local user on your host machine, you can simply type in that users name and password into the prompt.
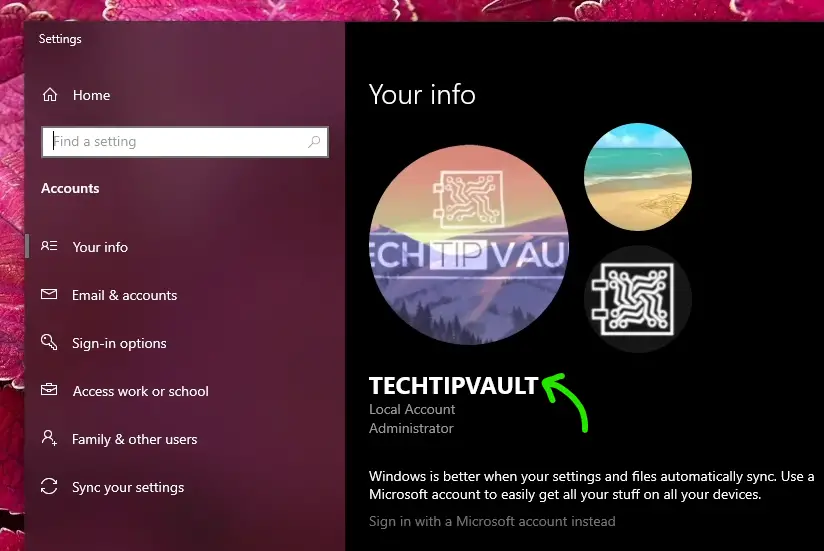
If you can’t find your username, you can simply type ‘Account info‘ into the search bar of the host machine and a window will pop up showcasing your username.
If you use a Microsoft account, it has been known to cause issues, especially if all your systems don’t use Windows 10.
If typing your Microsoft account e-mail and password doesn’t work, you can try typing MicrosoftAccount\youremail@email.com as the username. It has solved the issue for some users.
If even that doesn’t work, the easiest option is to create a normal local user and use those credentials to sign-in instead.
We recommend ticking the ‘Remember my credentials’ option so you don’t need to enter them again to access the shared folders.
After entering the credentials, if you see an empty folder, this means you have successfully entered the system and you’re ready to share files and folders.
Set sharing settings for a file or folder
Now that you’ve established a connection between the systems you want to share files between, it’s time to select what to share.
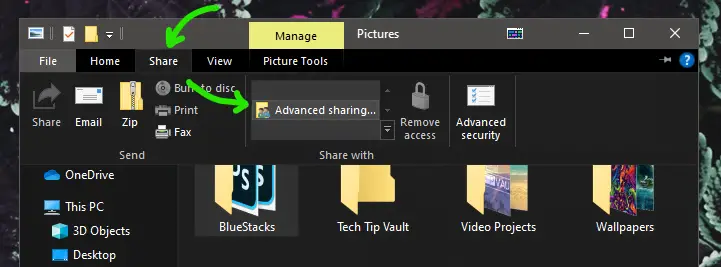
Thankfully Windows 10 has made this very easy. Once you find the folder you wish to share, select it and click on the ‘Share‘ tab at the top of the File Explorer.
Within the ‘Share’ tab, click on the ‘Advanced sharing…‘ button to select who should have access to the file or folder.
There seem to be two different layouts for the sharing options depending on your Windows 10 version, but their functionality is the same.
The more common interface is the normal properties view of the folder. After opening it up, click on the Advanced Sharing button as seen below.
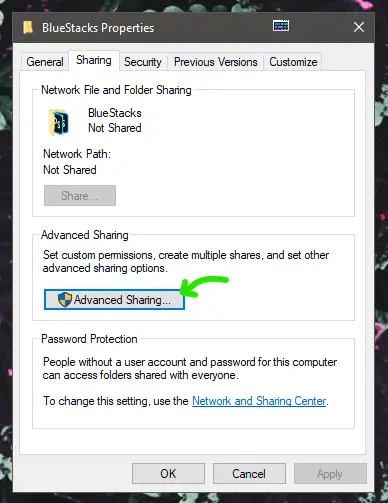
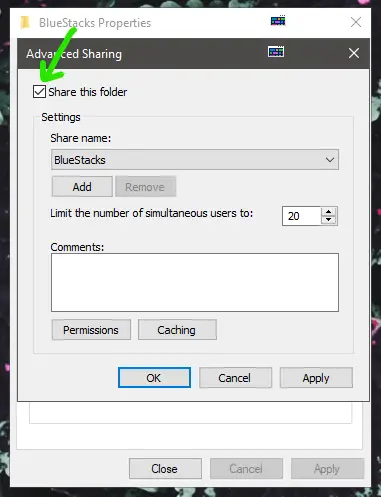
In the Advanced Sharing pop-up, all you need to do is tick the “Share this folder” checkbox and click OK.
Now other users can see your folder when they access your network device through the File Explorer.
Another possible layout can be seen in the video guide, which is a more clear layout when it comes to selecting different users.
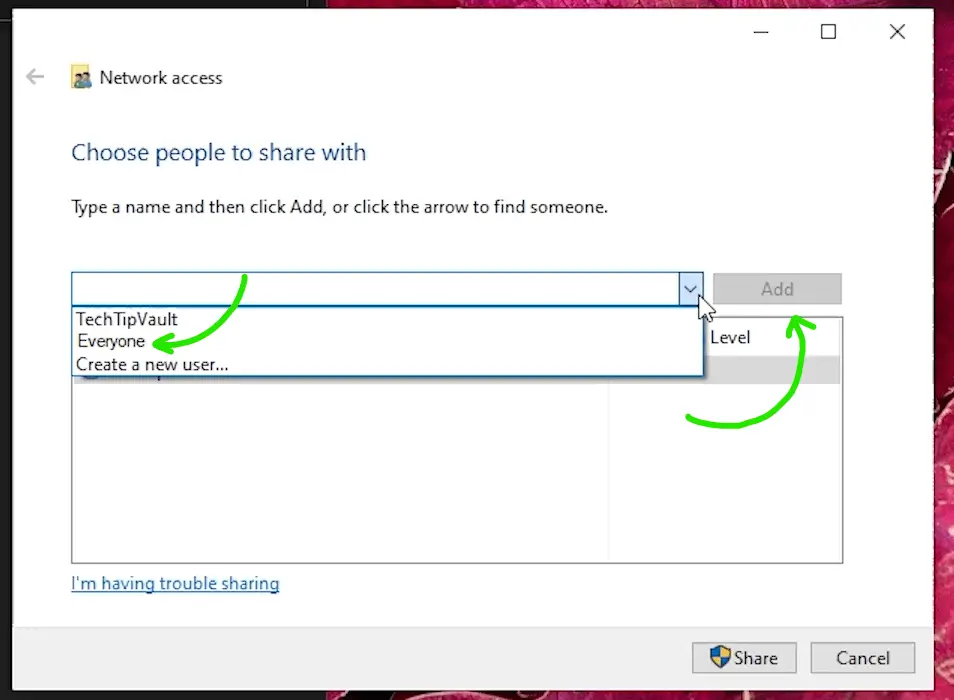
If you have the view above, all you need to do is select ‘Everyone‘ from the dropdown and click the Add button. This will share the folder with anyone who has access to your local network system.
Finally click the Share button to save the changes and make the folder go live.
One of the biggest issues when it comes to making network folders on Windows is the fact that the host PC has to be online to access the files from other systems.
Most people don’t have a system that is online 24/7, which can make accessing files from a shared folder very difficult.
Thankfully Microsoft thought about this and created the Windows Sync Center. It handles storing files from network folders to other systems’ local drives.
In order to synchronize a shared folder from another system, all you need to do is right-click on the folder and select ‘Always available offline‘.
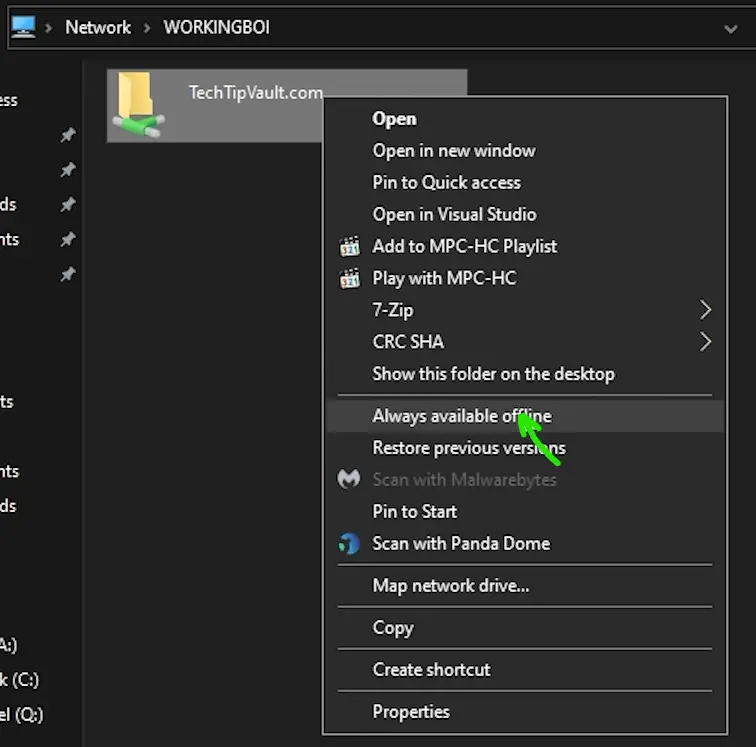
This option copies all the contents of the shared folder onto the current computers C-drive, so you can access the files even without having either system connected to the network.
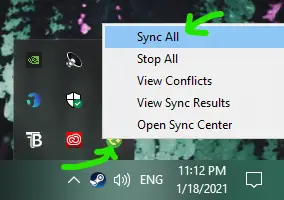
The only issue with syncing a folder is that you need to manually get any changes to the files.
This can be done simply by clicking on the Sync Center icon in the taskbar and choosing Sync All.
This functionality can be scheduled to run automatically through the Sync Center itself if you don’t want to do it manually every time.
If you don’t use Sync Center for the shared files, the host system has to be online at all times for any other PC to access those files, but the upside is that those files are always kept up-to-date automatically.
So if you do have the possibility to use an always-online system to act as the host for your files, it is definitely a more convenient option.
Check local storage of synced files
As mentioned earlier, if you decide to sync the files, they need to be stored somewhere on you system in order to access them offline.
It may seem like the files exist only in the shared network folder, but in reality Sync Center stores them onto your C-drive, hidden from view.
This hidden folder is actually located at C:\Windows\CSC which stands for Client-Side-Caching. Changing this folder is fairly complex, but there is a great guide on how to move the CSC folder on Microsoft docs.
To see how much space your shared files are currently occupying, you can open up the Sync Center from the taskbar and clicking ‘Manage offline files‘ at the left of the window and then choosing the ‘Disk Usage‘ tab.
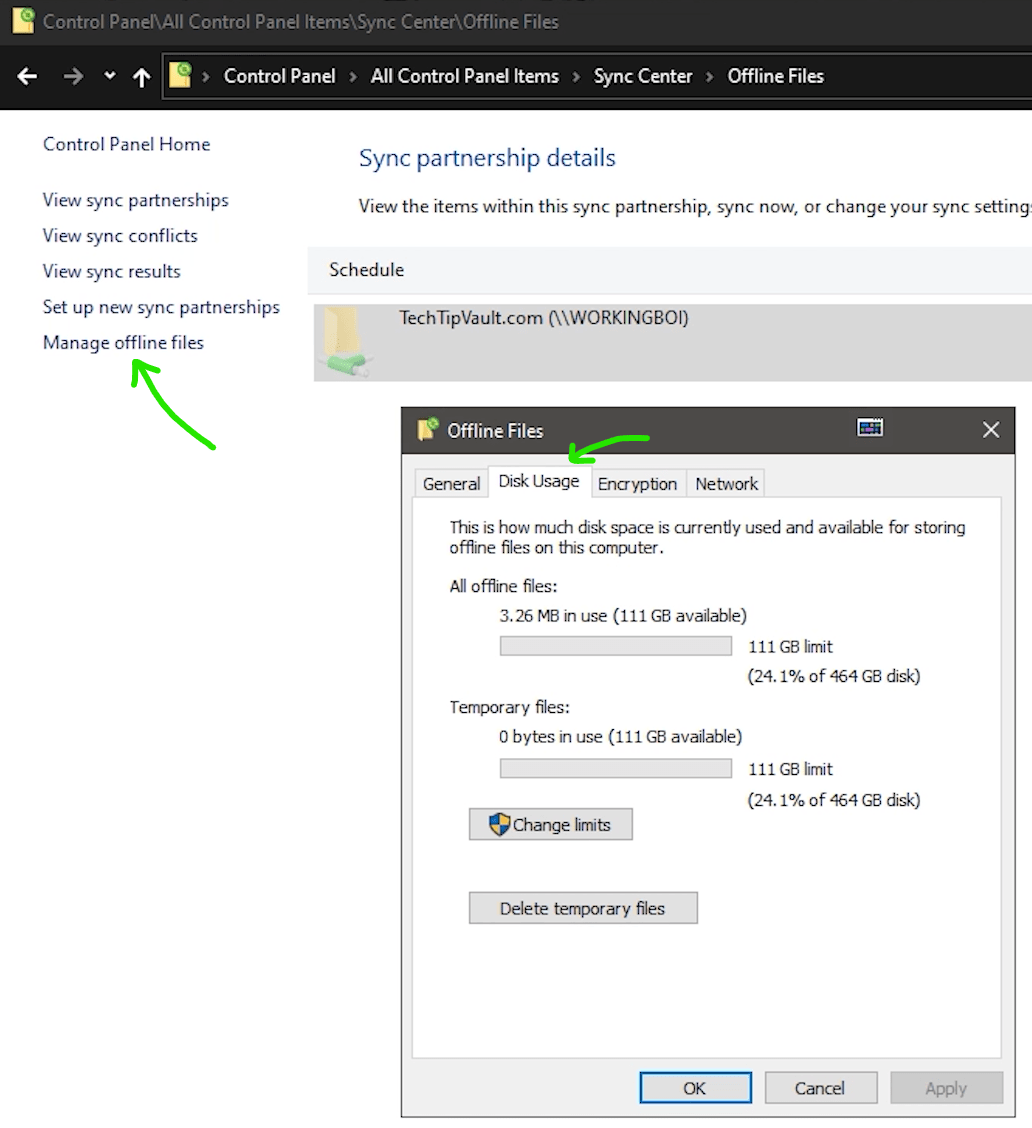
From this tab you can change the maximum amount you wish it to take from your C-drive, which might be a good idea if you accidentally transfer massive files into the network folder.
Making a shortcut for better accessibility
The fastest way to speed up your access to your shared folders is by adding them to the Quick access menu.
The Quick access menu can be seen on the left side hierarchy of the File Explorer and it also shows up when right-clicking File Explorer in the taskbar.
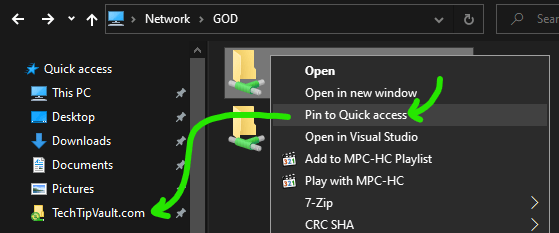
You can pin your shared local network folder to Quick access by right clicking on the folder and selecting ‘Pin to Quick access‘.
This method is great if you don’t need to pin the folder to your taskbar and are satisfied with opening it through the File Explorer every time.
However, if you wish to pin the folder to your taskbar, the folder can’t be simply dragged onto it.
To create a functional shortcut, you need to first right-click on your desktop and select ‘New > Shortcut‘.
Once the shortcut creation wizard opens up, click on Browse and find your shared folder.
Now you should see the path to your folder in the text box. All you need to do is add the path between double quotes and add the word ‘explorer’ in the beginning.

Before: \\WORKINGBOI\TechTipVault.com
After: explorer "\\WORKINGBOI\TechTipVault.com"
With that change you can click Next, choose any name for your shortcut and finish the wizard.
Now you can drag the shortcut into your taskbar and it will work normally. After pinning the shortcut, you can delete it from your desktop and the pinned item will still function normally.
If you wish to change the icon into something more recognizable, you can check the video in the beginning of this article.
Now that you’ve managed to share files and folders between multiple systems, it can get confusing to keep track of everything you’ve shared.
There is a handy little shortcut inside File Explorer which allows you to see everything you’ve shared within your local network from your current system.
To check your shared items, open up File Explorer and in the top bar type in \\localhost and press Enter.
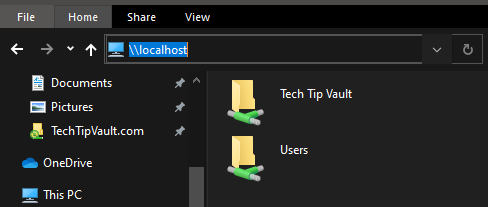
It is good to note that this path only shows the folders that you are hosting on your system. It will not show any files or folders you have access to on other systems.