
The night light is a feature more commonly seen on mobile devices as a method to reduce strain on the eyes.
The night light feature was added to Windows 10 and it’s still a quite rarely used feature, as a lot of users don’t realize it was introduced in the latest versions of Windows.
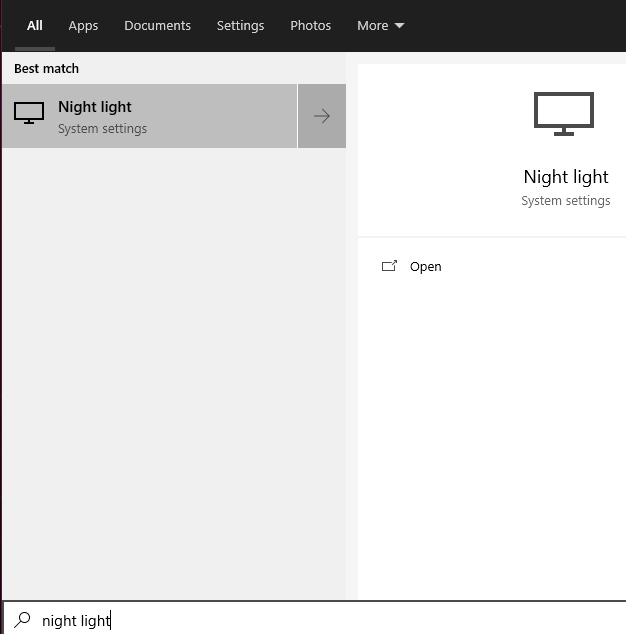
The easiest way to enable night light on Windows 10 is to just type ‘Night light‘ in your start menu search bar. Alternatively go to Settings from the start menu and click on System > Display to see the night light toggle button.
There are a few common issues with the night light functionality like the buttons being grayed out or disabled, but we also listed a few workarounds and fixes for such issues below.
Why is Night Light so Important?
A lot of people often think blue light is a myth and don’t give it a second thought. However it is very real and the human eye is not very good at blocking it.
Blue light in in itself isn’t harmful, but our screens emit a lot of it at full brightness levels which is a strain to the eye, especially in darker environments.
The night light or night mode changes the color output on your device screen, replacing bright blue colors with warmer ones that are less strenuous to the eye.
You will have an easier time going to sleep and your eyes wont start hurting after long sessions in front of your PC at night.
You can read more about the harmful effects of blue light here: https://www.allaboutvision.com/cvs/blue-light.htm
Turning On the Night Light Feature
You have most likely already tried to do this if you are reading this article, but let’s go through the basics just in case.
The fastest way to get to your night mode settings in Windows 10 is to open up your start menu and search for ‘Night light‘.
If you can’t find it, type in ‘Settings‘ and open it up. Then look for the ‘System‘ -button which includes a lot of different settings including the display settings. After clicking it, your display settings should open up automatically.
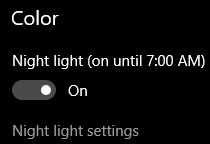
In the display settings you will see a Color header and under it a toggle button to enable or disable the night light.
From there you can also access the advanced night light options by clicking the ‘Night light settings‘ hyperlink.
You would have reached those settings directly by using the first method.
Now you should be able to see the advanced options of the night mode. You can toggle the feature on and off from the button at the top and change the brightness levels from the strength slider below the button.
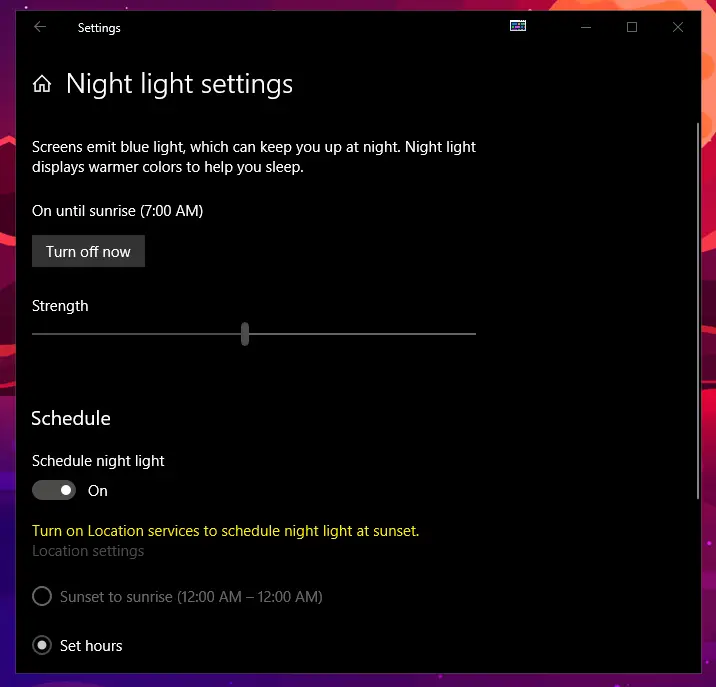
The best part about the settings window is that you can automate the night light to turn on and off at specific times of the day.
Simply toggle the schedule button and select the hours from the boxes below. This will then activate night mode every day at the same time.
Fixing Grayed Out or Disabled Night Light Options
It seems to be a very common occurrence on Windows 10 that the night mode toggle button is grayed out or disabled for seemingly no good reason.
There are a few known causes for this issue, the first one being a faulty registry entry.
Update your Graphics Drivers
The official Microsoft instructions for night light says that the most common issue with the feature not working is outdated or incompatible drivers.
This means you need to either update or re-install your display drivers as they are used to reduce the blue light and generate a warmer color scheme.
The Windows Updater should automatically download any required display drivers that you might need for the functionality, so make sure you have all the latest updates downloaded by typing ‘updates‘ in the search bar and opening up ‘Search for updates‘.
If you see nothing useful in the updates, you should go ahead and try re-installing your drivers. This process is quite simple and poses no risk to your system.
First you need to open up your Device Manager by typing it into the search bar or by opening up the ‘Run‘ prompt and typing in devmgmt.msc and pressing enter.
From the list, expand the ‘Display adapters‘ section and look for your graphics card.
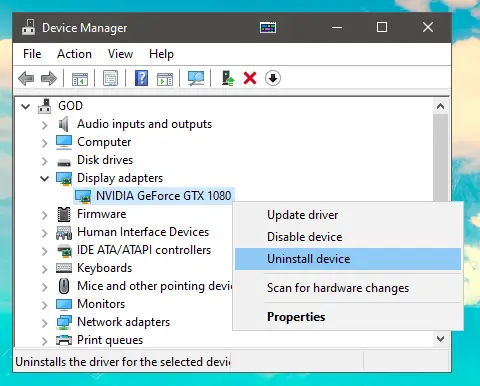
In order to check if your still have some possible updates, right-click on the card and select the top option to do an automated search for any updates.
If the search provides no updates, click on the ‘Uninstall device‘ option and go through all the prompts.
Once the process is complete, restart your system for the changes to take effect.
Once you’ve started your system up again, go back to the Windows updates as shown before and download the graphics driver updates that will show up. Windows 10 should look for the missing drivers automatically.
If nothing shows up, go back to the device manager and look for the drivers. If still nothing shows up, a simple google search with your GPU name followed by ‘drivers’ will take you to the correct installation files.
In case this hasn’t fixed the night light issues, move on to the registry fixes.
Fix the Night Light Entries from Windows Registry
Corrupted or faulty registry entries are the root cause for a lot of different Windows related issues. These are mostly caused by Microsoft rolling out new updates and not being able to properly update all registry values.
Thankfully editing the registry is quite simple and painless as long as you follow the steps.
First you need to type in ‘Registry Editor‘ into the start menu search bar and open it up. Alternatively, you can type in ‘Run’ and in the text box that opens up, type ‘regedit‘ to open up the same editor.
Next you need to navigate to the following folder in the hierarchy:
Computer\HKEY_CURRENT_USER\Software\Microsoft\Windows\CurrentVersion\CloudStore\Store\DefaultAccount\Cloud\
From that folder right click and delete the two following folders:
default$windows.data.bluelightreduction.bluelightreductionstate
default$windows.data.bluelightreduction.settings
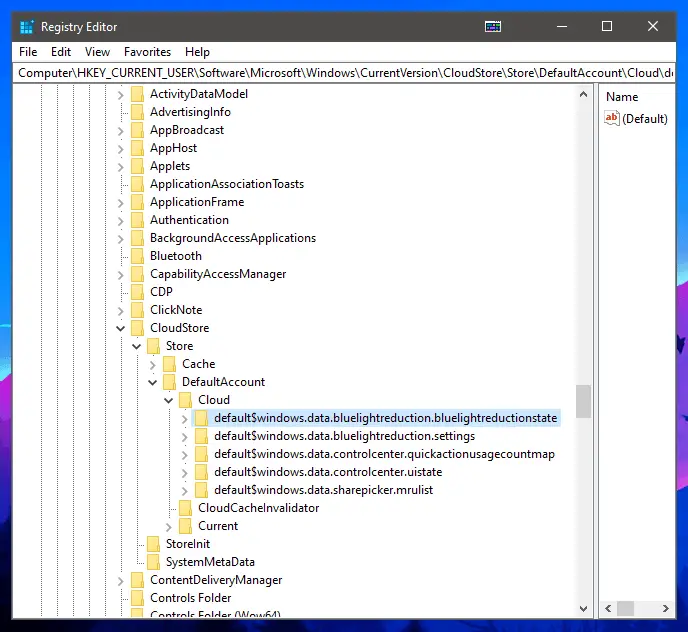
If you do not see the folders above, check if you can find them under the Cache > DefaultAccount folder in the same CloudStore directory.
Finally, you need to restart your system for the registry changes to take effect.
Best Third Party Software for a Night Light
If for some reason the troubleshooting above hasn’t fixed the issues, there are two great alternatives to the native Windows functionality. The first one, flux, provides the best lighting settings, but doesn’t allow setting specific starting times for the night light, as it uses your geographic location for the timing.
The second software is a little more lightweight and allows you to set specific values and timers, while being a little less professional with its user-interface.
F.lux
F.lux is a free solution to reducing blue light on your computer screen and it provides a more user-friendly interface and options in comparison to the Windows 10 settings.
Once you’re done installing the software, it will ask for your location to be able to estimate the proper time-zone to set the color levels automatically. You can set any country or location and the app will then determine when it should adjust your screen brightness accordingly.
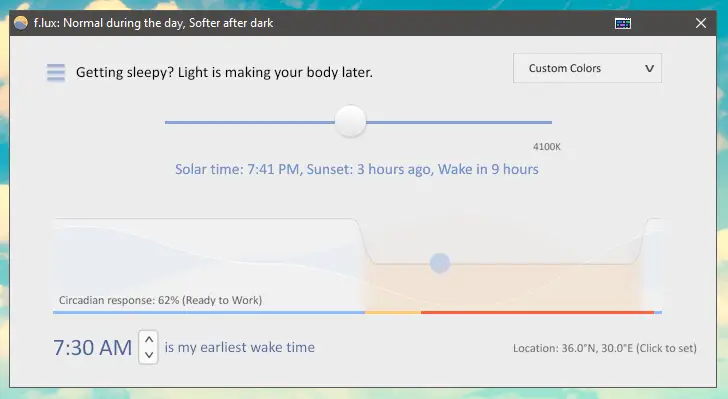
There is a clear graph in the middle showing your current settings and what would be an optimal setting to use. You can then set up your usual wake-up time, so the light wont be dim too early.
There are plenty of options for smart lighting, custom pre-made color schemes from candle light to daylight.
The software even has possible optimizations depending on what type of monitor you are using.
We highly recommend giving f.lux a chance even if you are using the Windows 10 night light, as you might like it more.
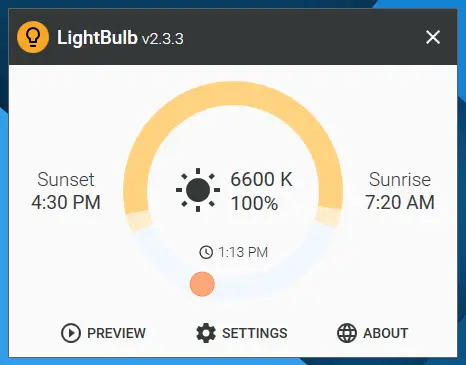
LightBulb
LightBulb is an independently developed small application that provides great customization for your Night Light functionality.
The clean user-interface allows you to preview what your current settings will look like, after which you can set all the color temperatures and timings to whatever values you wish in the settings.
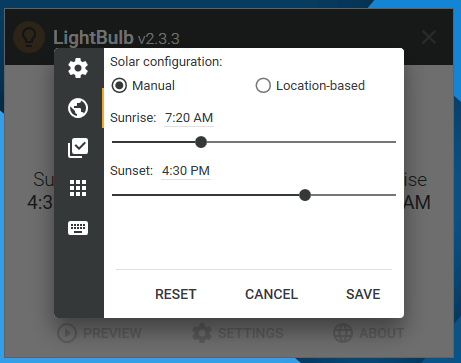
You can also set the timers to adjust automatically according to your location, but they’re not quite as accurate as f.lux.
LightBulb also allows the setting of custom shortcut keys to adjust the colors and turning the night light on or off.
This is definitely the best alternative if you don’t quite like the limited settings in f.lux.
In order to download LightBulb, go to its official GitHub page from the link below and download the latest LightBulb-Installer.exe file.