A lot of people miss the cool gadgets like the clock and sticky notes on your Desktop from Windows 7. Sadly they are no longer included in Windows 10 as Microsoft deemed them to be a security risk.
However, many of the functions used in the old Windows Gadgets are still available throughout Windows 10.
There are a few ways you can get a clock on your desktop, one being the Live Tiles function built-in to Windows or you can download separate apps to show one or even use a desktop designer software called Rainmeter.
The implementation of Live Tiles allows you to view their time and data information in the notification area.

You can access this by clicking the time and date in your task bar at the bottom right of your screen. Obviously this is slightly redundant as it will show the same timer, just larger.
The good part about the view is that it also shows the date and the calendar to provide mode usefulness.
If your goal is to have a visual clock shown on your desktop at all times, we’ll show a few simple ways to accomplish that for free.
Alarms & Clock App on Windows 10 Desktop
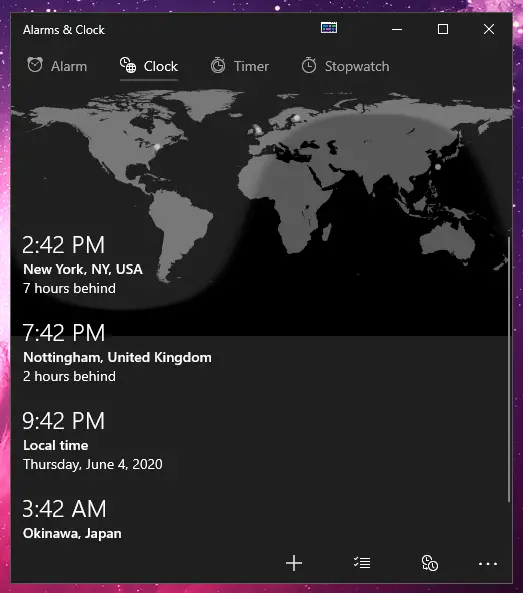
Windows 10 has its own built-in clock app named ‘Alarms & Clock‘ that provides features like an alarm, clock, timer and a stopwatch.
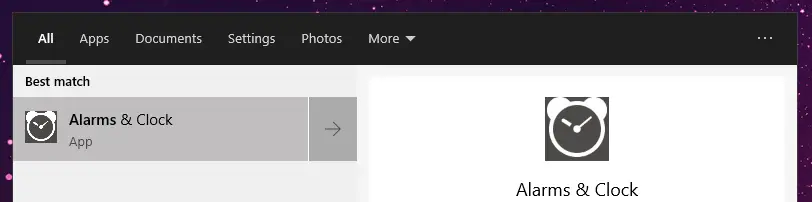
In order to launch the app, open up your Windows Start Menu and type in ‘alarms‘. You should then be able to open up the ‘Alarms & Clock’ app in the list.
The interface contains four different tabs, one for each of the features mentioned above.
We will solely be focusing on the Clock feature and how to personalize it according to your needs.
If you need to change your time zone settings for the Local time clock, navigate to Settings > Time & language > Data & time.
Alternatively, you can right-click on the time and date box in the bottom-right corner of the screen and from that menu, select ‘Adjust date/time’ at the top.
In the Date & Time window you are able to use the drop-down menu to choose an appropriate time zone as well as modify other related settings.
You can also synchronize your clock online in case you notice it lagging a few minutes behind.
In order for you to get a visual digital clock, as seen below, all you need to do is reduce the size of the app by dragging from the top right corner to the middle.
This will make allow you to place the clock anywhere on their desktop and it will be visible when you are viewing the desktop.
In order to automatically launch the app at start-up, you can check out how to do that in our guide on how to speed up your Windows 10.
If you wish to open up the app quickly, you can simply right-click on its icon in the taskbar while the app is open, then select ‘Pin to taskbar’, so you can always open it up with a single click.
Gadgets and Desktop Widgets for Windows 10
Even though Microsoft has removed their integrated sidebar gadgets that were a controversial feature in prior versions of Windows, it is still possible to get access to similar gadgets on Windows 10.
This can be done easily using free third-party applications and software.
8GadgetPack
Arguably the most popular gadget software currently available for a Windows 10 desktop clock is 8GadgetPack. This is a freeware software that allows users to run original desktop gadgets on newer versions of Windows, including Windows 10.
Getting 8GadgetPack up and running is very simple. Just head on over to the 8GadgetPack Official Website and follow the installation instructions on their website.
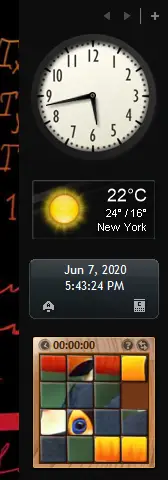
Once you’re done installing the app, exit the installer and you should be greeted with three classic gadgets on the right side of your screen, the clock, clipboard and weather.
If you have multiple monitors, your gadgets may appear on one of your secondary monitors at first. Thankfully this is not an issue as you can simply drag and drop any of the gadgets anywhere across all of your monitors.
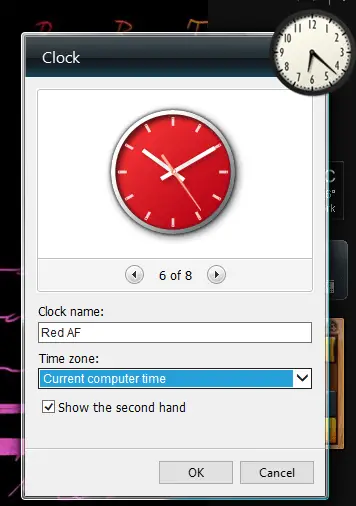
Next to the clock you are able to press the ‘Options’ button in order to customize the clock to your liking and also set the preferred time zone. There are up to 8 designs to choose from.
Once you have customized the clock to your liking, simply drag the gadget from the menu anywhere on your desktop and now you have an awesome clock displayed on your desktop at all times.
You can also find digital cocks and calendars from the widget list so you can show the clock on your desktop in any fashion you wish.
The 8GadgetPack comes packed with over 60 different widgets to use, so make sure to take advantage of them. You can easily add new gadgets to the side-panel by clicking the little plus icon at the top-right corner.
Yahoo Widgets for Windows
Yahoo Widgets is another alternative to the above-mentioned desktop gadgets. The only issue is that the Yahoo Widgets software was discontinued, so you can’t download alternative widgets online anymore.
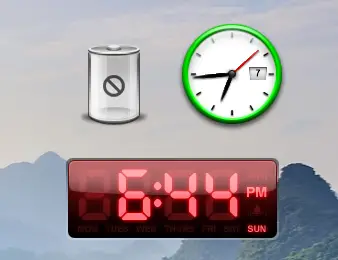
The good thing is the included widgets still work perfectly and they include things like a clock, a digital timer, a battery level indicator for laptops and a few others.
In the end it really depends on which designs you prefer, but due to the more limited options, we prefer the 8GadgetPack instead.
Although both gadget packs work perfectly on Windows 10, we highly recommend you take the extra effort and try out Rainmeter instead.
Using Rainmeter for Desktop Widgets
Rainmeter allows you to display customizable skins on your desktop, the scope of this being vast and the only limiting factor, your imagination and creativity.
A simple example use-case of Rainmeter would be the implementation of an animated clock on your desktop.
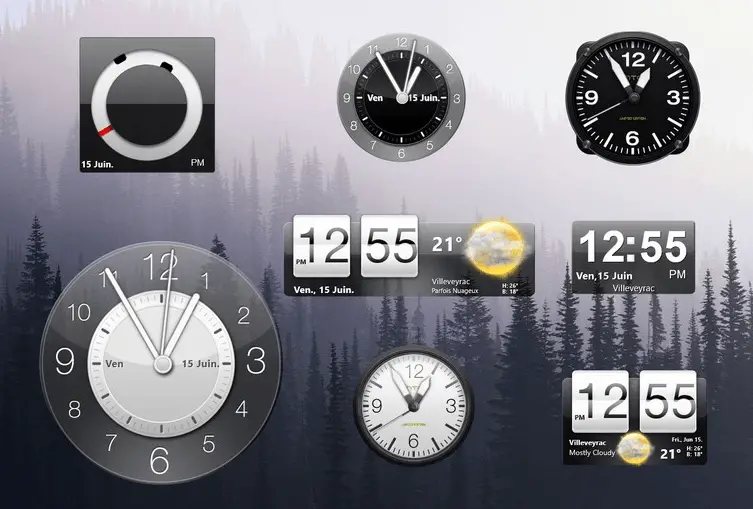
The sheer number of customizable clocks that are available on Rainmeter ensure anyone wishing to display time on their desktop will do so in the coolest way possible.
In order to use Rainmeter, head over to the official Rainmeter website and download the newest ‘Final Release’ installer. After downloading the file, run the .exe and install it to the desired location.
We recommend installing it to same drive as your operating system, since the drive will stay active/turned on 100% of the time Rainmeter is running.
Next up, head on over to a website called Visual Skins and you will be greeted with a massive plethora of amazing gadgets and widgets that can be directly added to Rainmeter.
Download any one widgets you like and move on to the next step. (We used the HTC Sense Clocks collection below.)
Adding a Skin to Your Desktop
Once you found out a cool skin to use, make sure to download it and locate your downloads folder.
After downloading the installer (.rmskin file), if it is compressed in a zip file, simply extract the file anywhere first and then double click on it.
You will be greeted with an installation screen where you can see the widget you are about to install. All you need to do next is make sure the widget is selected and click the Install button.
The new widget should now pop-up on your desktop and is ready for any modifications.
In order to find all the Rainmeter settings and installed skins, navigate to the bottom-right of your taskbar and left-click on the Rainmeter icon.
A management window will open up showing your current active skins.
You should see the skin you just installed on the folder hierarchy on the left. Click on it to open up the folder and look for an .ini file.
Each Rainmeter widget consist of an .ini file which basically contains all the needed options and design settings for the widget to operate.
If you wish to edit more complex options for a widget, click on the ‘Edit’ button at the top right to modify everything further.
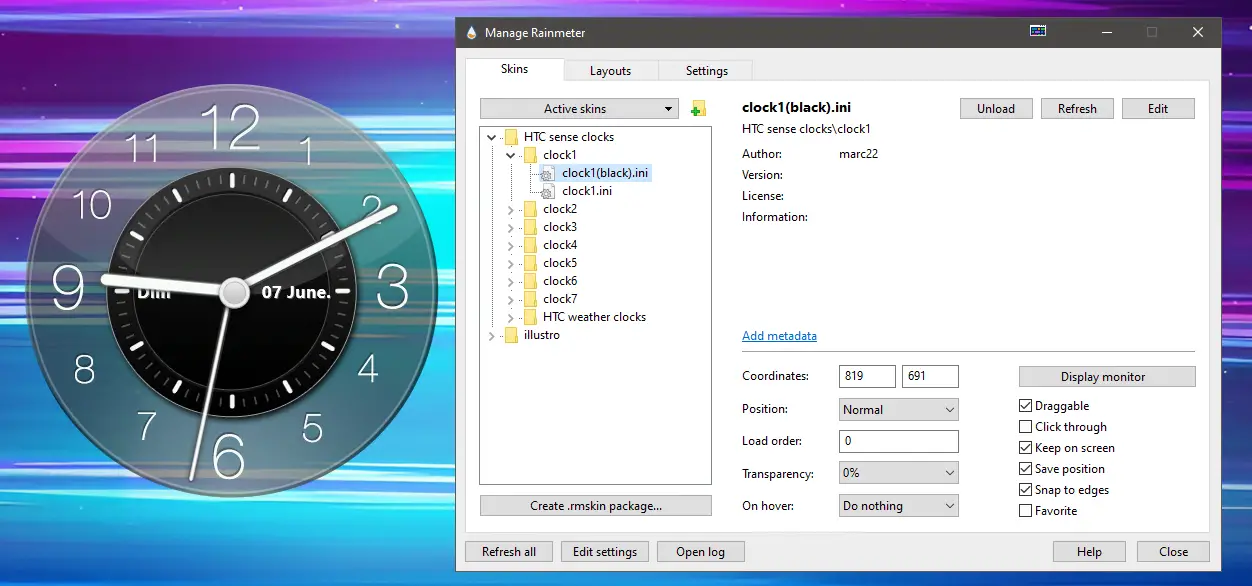
In order to use this clock on your Windows 10 desktop, simply double-click the .ini file and you should immediately see the clock appear on your desktop.
You have now successfully added a clock to your desktop that is fully customizable.