Streaming and animated wallpapers have become increasingly popular so it’s important to keep your desktop clean by hiding useless shortcuts and icons.
Windows 10 has a built-in way to hide desktop shortcuts, but it is quite slow and there are a few more convenient ways to do it.
You can toggle the visibility of your desktop icons from the View submenu under properties as well as by getting third-party programs and adding hotkeys to them for easier activation.
How to toggle desktop shortcut visibility
The easiest way to toggle the visibility of your desktop shortcuts is simply by right-clicking on your desktop, then going to View > Show desktop icons.
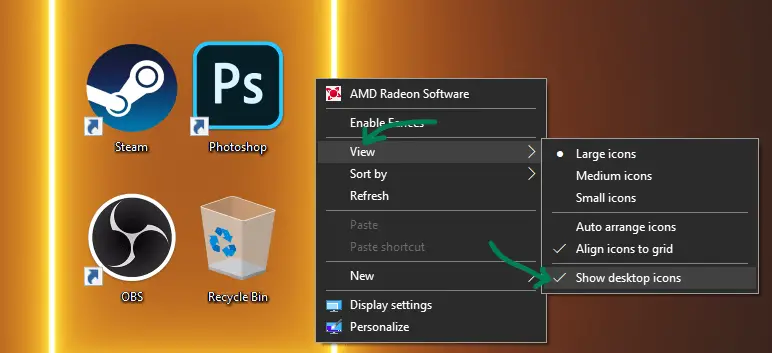
You can simply toggle them back by clicking the same menu option again.
This is usually enough for most people who rarely need to use any of their desktop shortcuts, but can be very inconveniently slow if you need to do it constantly.
In that case you should consider getting a separate software to do this with a hotkey or a key combination.
Binding desktop icon visibility to a shortcut key
Sadly there is no simple way to bind the built-in Windows 10 visibility toggle to a hotkey and it can’t be added to a simple batch file, so we need a small third-party executable to accomplish this.
The first thing you need to do is download and extract the small executable called HideDesktopIcons.exe which allows you to toggle the icons with a simple click.
Once you’ve downloaded the file, you need to extract the executable from the zip file into any directory, but don’t keep it on your desktop.
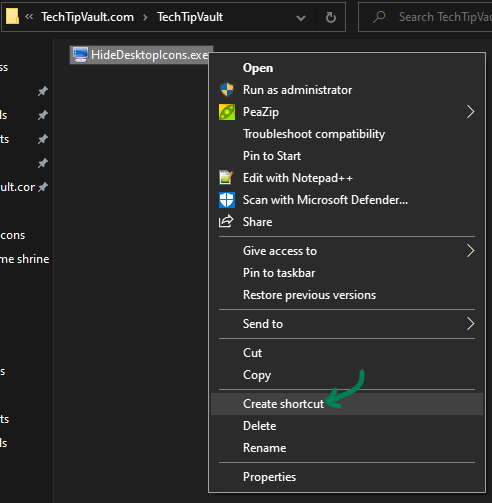
Next right-click on the new .exe -file and click on ‘Create shortcut’.
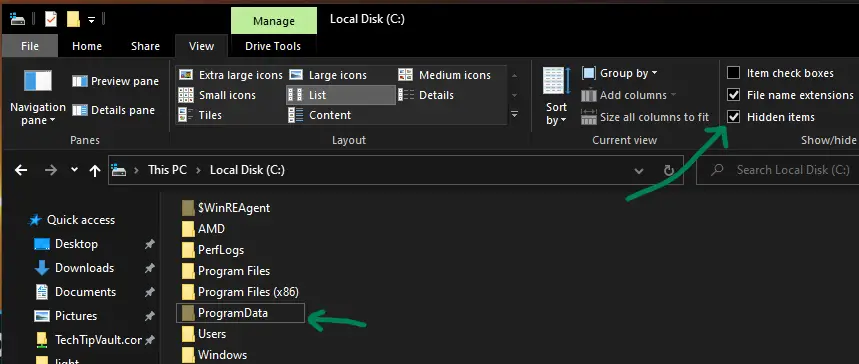
Now you need to drag-n-drop that new shortcut into the folder below:
C:\ProgramData\Microsoft\Windows\Start Menu\Programs
If you don’t see the ProgramData folder, you need to enable the showing of hidden folders from the View tab at the top of the File Explorer.
Now your new shortcut should be in the Programs folder. The reason we have to place it there is because Windows doesn’t recognize the shortcut key combinations if the file is in any other folder.
Finally, to select your wanted hotkey to toggle the visibility, right-click on the new shortcut and go to Properties.
In properties, go to the Shortcut tab and click on the ‘Shortcut key’ textbox and press any button on your keyboard, for example the ‘H’ key.
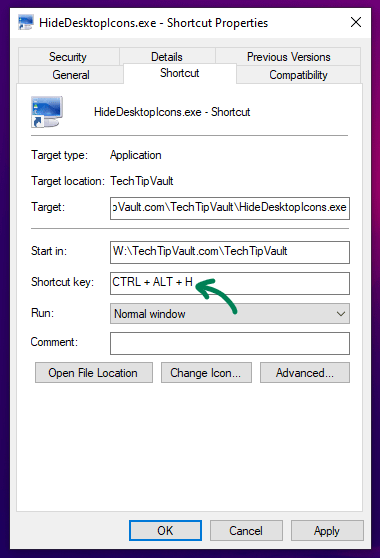
The main issue with this is that Windows automatically adds Ctrl + Alt to all the shortcut keys and this can’t be changed. Also make sure the combination is unique so it doesn’t interfere with any of your other programs.
After this, you need to restart your computer due to the location of our shortcut. Windows needs to load it up at startup.
Now you should be able to show and hide your desktop icons simply by pressing ‘Ctrl + Alt + H’ or whatever shortcut you chose.
Solutions if Windows shortcut keys don’t work
Sadly the shortcut keys in Windows 10 have a fifty-fifty chance of working properly and a lot of people seem to have issues with them having an activation delay or simply not working at all.
A simple fix would be to simply drag the executable to your taskbar so you can toggle it from there by clicking it, but it is often not desirable.
If the .exe doesn’t work even by just clicking on it, in some cases, you need to download the Visual C++ 2005 Service Pack for the executable file to work properly, due to it being fairly old. If that doesn’t help, try downloading the very latest one from Microsoft. You will also need to restart your computer after this.
I had to download both of those resources for the Windows shortcut keys to start working.
Toggle desktop icon visibility with Autohotkey (using any keys)
AutoHotkey is a legendary free macro script creator that has been around for decades and has a huge community surrounding it.
We can create a simple script that runs at startup which does the same functionality as above.
This is probably the best method to hide desktop icons with a hotkey, but we decided to explain it here since it does need to run in the background at all times (although it requires little to no resources).
First off download and install AutoHotkey from their official website from the button below.
Once you have successfully installed the program, we just need to create the script.
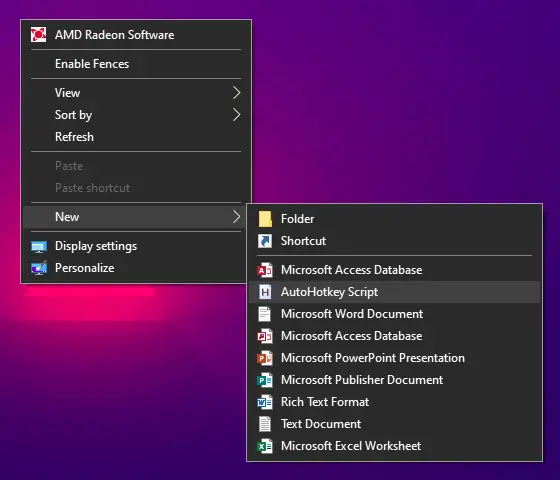
To create a new script, right-click anywhere on the desktop and select New > AutoHotkey Script.
You can name it whatever you want, then right-click on the new file and click ‘Edit script’ in the menu.
It should open up in Notepad with some text already in it. Delete all the current code in the text editor and paste the code below into the text file.
F10::

ControlGet, HWND, Hwnd,, SysListView321, ahk_class Progman
If HWND =
ControlGet, HWND, Hwnd,, SysListView321, ahk_class WorkerW
If DllCall("IsWindowVisible", UInt, HWND)
WinHide, ahk_id %HWND%
Else
WinShow, ahk_id %HWND%

Return
The very first row is the key you need to press to toggle the visibility. You can change it to anything you wish, for now it will be the F10 key.
Now save the file and test to see if it works by right-clicking on the file and choosing ‘Run script’.
You should now be able to toggle your desktop icons by pressing the F10 key.
Finally we will add the script to startup automatically when we start Windows.
To do this, you need to copy the file into your startup programs folder which can be found at:
C:\Users\TechTipVault\AppData\Roaming\Microsoft\Windows\Start Menu\Programs\Startup
If you can’t see the AppData folder, toggle your ‘Hidden items’ in the View tab at the top of File Explorer to see hidden folders.
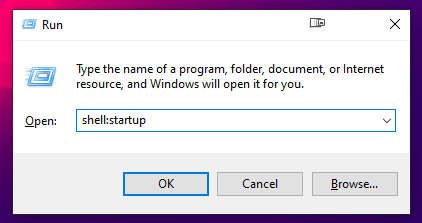
An easier way to find this folder is by typing ‘Run’ into your search bar and then running the following command:
shell:startup
Finally just copy and paste the script inside of that folder and it will automatically activate when you launch Windows next time.

Note that the script does need AutoHotkey to be running at all times for it to work, it should start up with Windows automatically as well.
Using Fences to toggle desktop visibility
Fences is a paid software which is why we added it as the last solution here. However we’ve been using it for years due to it’s convenience and other additional features.
It can also be bought from Stardocks official website, but for some reason they don’t provide a permanent activation, but Steam does.
You only need to launch the app through steam once, then it will run without steam without any issues.
The reason why we included Fences here, is because it allows you to simply double-click anywhere on your desktop to toggle your icons’ visibility.
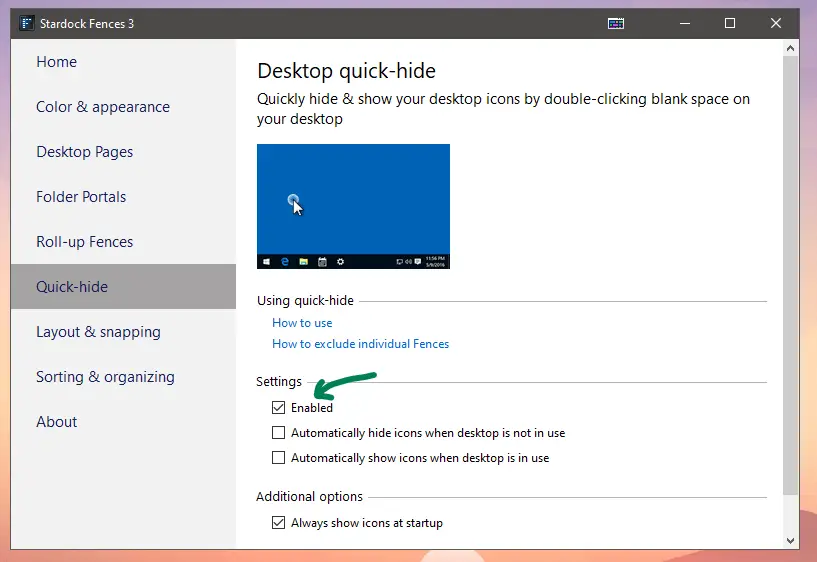
It is fast and easy alongside providing very convenient ‘fences’ that hold your desktop shortcuts in stylish boxes that can be labelled or moved around.
You can even add auto-hiding and labels to those boxes as well as vertical scroll-bars.
We’re not affiliated with Fences in any way, we just really enjoy the functionality and it’s definitely worth the price.
Hide a specific file or folder
If you just want to hide a single file or folder in Windows 10, it can be done very easily from File Explorer.
All you need to do is right-click on any file or folder and go to Properties. Then tick the ‘Hidden‘ checkbox under Attributes.
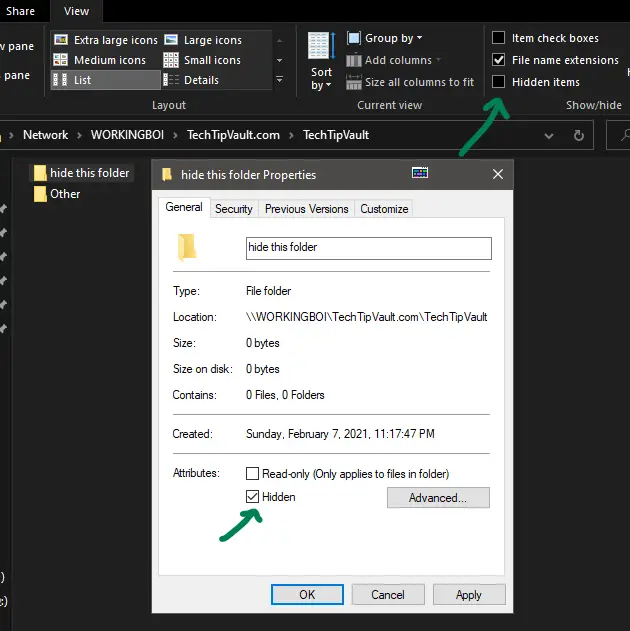
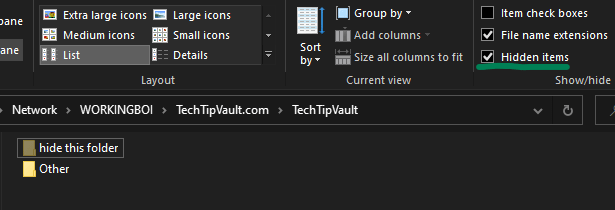
If you still see the file but just slightly gray, you need to make sure that you have unchecked the ‘Hidden items’ option under the View tab within File Explorer as seen in the right image above.
If you hide a folder and there’s items inside the folder, you will get a prompt asking if you wish to also hide all files inside that folder or only the parent folder.